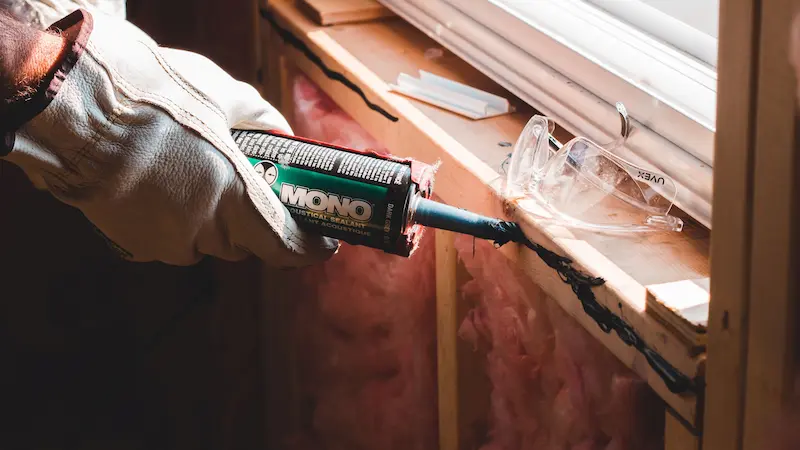
Quick answer: To insulate windows for winter on a budget, first find out whether the problem is an air leak or heat loss through the glass. For a leaky sash, weatherstrip the moving parts and caulk the fixed frame around it. For cold glass with no detectable draft, use window insulation film, an insulating curtain, or a DIY interior storm panel. Most fixes cost under $20 per window and can be done in under an hour.
If cold air seems to seep into your living room every time the temperature drops, your windows are probably the reason. Windows are a major point of heat loss in most homes, and the fix doesn’t have to mean a full replacement project when making your home more sustainable on a budget. Depending on what’s actually causing the draft, you may be able to solve it with a roll of weatherstripping, a tube of caulk, or a $5 bag of rope caulk.
The right method depends on where the cold is coming from and how your particular window is built. A window that’s losing heat through single-pane glass needs a different fix than one leaking air around a loose-fitting sash. This guide walks through how to find the source of the problem, seven budget-friendly ways to insulate windows for winter, and how to tell which one actually fits your situation.
Where Are Your Windows Actually Losing Heat?
Before buying anything, it helps to understand that a cold window can mean two different things. Air leakage happens through cracks and gaps that let outdoor air move into your home, while a window can also feel cold simply because heat is transferring through the glass itself. Not every cold window has a leak. A tightly sealed single-pane window can still feel drafty near the glass because heat radiates and conducts through it, even with no air movement at all.
To figure out which problem you have, try a few low-tech checks instead of anything involving an open flame:
- Run your hand slowly around the window frame, sash, and where the sash meets the sill, feeling for moving air on a cold or windy day.
- Close the window on a dollar bill or a strip of paper at a few points along the frame. If you can pull it out without any resistance, air is probably getting past the seal at that spot.
- Look for daylight visible around the frame or between the sash and frame when the window is closed.
- Check whether the sash rattles or has visible gaps when you try to move it, since movement often signals an air leak.
From there, sort what you find into categories: leakage around a part that opens and closes, gaps around a fixed frame, heat loss through the glass itself with no detectable airflow, or general discomfort near the window that might call for a window covering rather than a seal. Each of those points toward a different fix below.
7 Budget-Friendly Ways to Insulate Windows for Winter
1. Apply Window Insulation Film
Best for: Heat loss through the glass on windows you don’t need to open during winter, especially older single-pane windows.
Materials needed: A shrink-film window insulation kit (film plus double-sided tape), scissors or a utility knife, a hairdryer, and a cleaning cloth.
How to do it: Clean the window and frame thoroughly, then apply the included double-sided tape around the frame and sill. Measure and cut the film with a few inches of overlap on each side, then press it onto the tape starting at the top and working down the sides and across the bottom, keeping it as smooth as possible. Finish by running a hairdryer a few inches from the surface to shrink the film tight, then trim the excess with scissors or a utility knife.
Cost: Very low, typically a single kit per window.
Advantages: Inexpensive, creates an insulating air pocket over the glass, and doesn’t require any permanent changes to the window.
Limitations: It seals the window shut for the season, so it only works on windows you won’t need for ventilation or emergency escape. Performance depends heavily on how tightly the film is applied, and it can look cloudy or distort the view.
2. Add Weatherstripping Around Movable Window Parts
Best for: Air leaking around a window sash that opens and closes, such as a double-hung or sliding window.
Materials needed: Weatherstripping suited to your gap (foam tape, V-strip vinyl, or felt), scissors, and a cleaning cloth.
How to do it: Choose a weatherstripping type based on where it will go. Felt and open-cell foam are inexpensive but less durable and effective, while vinyl holds up well and resists moisture. Apply it to a clean, dry surface in temperatures above 20°F, pressing it snugly so it compresses when the window closes without binding the sash. For windows specifically, fit the weatherstripping between the sash and frame so it doesn’t interfere with the window’s ability to open and close.
Cost: Low, generally a few dollars per window depending on the material chosen.
Advantages: Caulking and weatherstripping are simple, effective air-sealing techniques that typically pay for themselves in energy savings within about a year. It preserves the window’s ability to open.
Limitations: Only addresses the moving joint, not gaps around the fixed frame or heat loss through the glass. Material wears out over time and should be inspected periodically, especially in high-traffic locations.
3. Seal Suitable Gaps Around Fixed Window Frames
Best for: Small, stationary cracks and gaps between the window frame and the wall or trim, where nothing needs to move.
Materials needed: An exterior- or interior-rated caulking compound, suited to the surface, and a caulking gun.
How to do it: Caulk is meant for cracks and joints less than a quarter inch wide between stationary building components. Hold the caulking gun at a 45-degree angle against the clean, dry gap and apply the bead in one continuous, steady motion rather than stopping and starting. Expect roughly 24 hours for the caulk to fully cure, depending on air temperature and humidity.
Cost: Very low, a single tube of caulk typically covers several windows.
Advantages: Long-lasting and effective at stopping air leakage through small stationary cracks.
Limitations: Caulk is not designed for anything that moves, such as the window sash itself. Caulking over a part that needs to slide or swing will damage the window’s operation, so it should be reserved for truly fixed joints around the frame and trim.
4. Use Thermal Curtains or Insulating Liners
Best for: Reducing the feeling of cold radiating off window glass and cutting general heat loss through the window area, not for fixing an actual air leak.
Materials needed: Insulated curtains, thermal liners for existing curtains, or a curtain rod mounted close to the window frame.
How to do it: Mount the rod so the curtain extends past the window frame on each side and close the curtains at night and on overcast days. Hanging curtains as close to the window as possible and sealing the edges to the frame with tape or Velcro improves their effect. To work as insulation, the covering has to trap and hold a layer of air between itself and the glass, so a loose, open-sided curtain does far less than a snugly fitted one.
Cost: Low to moderate, depending on fabric and size.
Advantages: A properly fitted treatment can meaningfully reduce heat loss, and even ordinary curtains and drapes provide some benefit.
Limitations: Curtains manage comfort and heat transfer, not air leaks. They won’t fix a drafty sash or gapped frame, and loosely hung curtains without edge sealing provide only modest benefit.
5. Use a Window Draft Stopper Where Appropriate
Best for: Blocking a localized draft at the bottom of a window sash or sill, particularly on older windows with a persistent gap at that single spot.
Materials needed: A fabric draft stopper (or a rolled towel or fabric tube filled with rice or dried beans).
How to do it: Place the stopper snugly along the base of the sash or sill where the draft is strongest. It can be removed in seconds whenever you need to open the window.
Cost: Very low, and a homemade version costs almost nothing.
Advantages: No installation, fully removable, and useful as a quick fix while you plan a more thorough repair.
Limitations: A draft stopper only blocks the specific spot where it sits. It does nothing for leaks elsewhere around the frame, and it isn’t a substitute for weatherstripping or caulking the actual gap. It also has to be moved every time you want to use the window.
6. Use Removable Rope Caulk for Suitable Temporary Sealing
Best for: Sealing gaps around a window sash or frame on a temporary, seasonal basis, especially useful for renters who can’t apply permanent caulk.
Materials needed: A roll of rope caulk, alcohol wipes or a similar cleaner, and scissors or a utility knife.
How to do it: Clean and dry the surface first, then cut the rope caulk to the length needed. Press it firmly into the crack or gap by hand and smooth the surface for a neater look, trimming any excess with a knife rather than pulling it to break it off. Rope caulk is removable and can be reused if it’s still pliable, which makes adjustments easy.
Cost: Very low, generally around $5 to $7 for a roll long enough to cover several windows.
Advantages: Unlike standard caulk, it leaves no residue when removed and works well for rental properties or seasonal use. No tools or curing time required.
Limitations: It’s a seasonal fix, not a permanent repair. It must be fully removed before you need to open the window, including in an emergency, so don’t use it anywhere that compromises quick egress. It also isn’t a substitute for repairing a damaged seal or rotted frame.
7. Consider a DIY Interior Window Panel or Secondary Glazing
Best for: Homeowners or long-term renters who want a bigger improvement than film or weatherstripping can offer and who are willing to spend more for it, particularly on drafty single-pane windows.
Materials needed: A rigid interior storm window kit, acrylic or glass panel, magnetic or compression-fit frame, and a tape measure.
How to do it: Interior storm panels fit over the existing window on the room side, creating a sealed air gap between the two layers. Interior storm windows should fit snugly into the window frame so the air space is well sealed. Many retail kits snap into place with a compression frame or magnetic strip, making them removable for cleaning or summer storage.
Cost: Moderate. This is the most expensive of the seven methods, with kits priced per window and total cost scaling with how many windows you cover.
Advantages: Low-e interior or exterior storm windows can deliver energy savings similar to full window replacement at roughly one-third of the cost, and can save 10 percent to 30 percent on heating and cooling costs depending on the condition of the existing window. It’s a bigger jump in performance than film or curtains alone.
Limitations: It’s not a true budget option compared to the other six methods, and installation takes more time and precision. If the interior panel isn’t airtight and allows humid indoor air to reach the gap, condensation can form between the panel and the original window, so a snug, sealed fit matters.
Which Window Insulation Method Should You Choose?
| Method | Best use | Relative cost | Installation difficulty | Temporary or more permanent | Main limitation |
| Window insulation film | Heat loss through glass, windows you won’t open | Very low | Easy | Seasonal (removed in spring) | Seals window shut |
| Weatherstripping | Air leaks around moving sash | Low | Easy to moderate | More permanent | Doesn’t fix fixed-frame gaps |
| Caulk | Stationary cracks around fixed frame | Very low | Easy | Permanent | Can’t be used on moving parts |
| Thermal curtains/liners | Comfort and radiant heat loss | Low to moderate | Easy | More permanent | Doesn’t stop air leaks |
| Draft stopper | One localized gap at sill or sash base | Very low | None | Fully temporary | Only blocks one spot |
| Removable rope caulk | Temporary seal, rental-friendly | Very low | Easy | Seasonal, removable | Must be removed to open window |
| Interior panel/secondary glazing | Bigger overall insulation upgrade | Moderate | Moderate | More permanent, removable | Highest cost of the seven |
Use this as a starting point, not a final answer. Most homes end up combining two or three of these: weatherstripping on a leaky sash, caulk on the fixed trim around it, and a thermal curtain for comfort, for example.
Does Insulating Windows Actually Lower Your Heating Bill?
The honest answer is that it depends on your starting point. Heat gain and heat loss through windows are responsible for roughly 25 to 30 percent of residential heating and cooling energy use nationally, which is why windows are worth paying attention to. But that figure describes the role windows play across the housing stock as a whole, not a guaranteed savings percentage for any single budget fix in your home.
It helps to separate four different things: comfort near the window, reduced air leakage, reduced heat transfer through the glass, and your actual heating bill. Sealing a drafty sash will usually make a room feel more comfortable almost immediately and help lower your electricity bill by reducing air leakage. Larger upgrades like low-e storm windows or panels have documented savings in the range of 10 to 30 percent on heating and cooling costs for homes with inefficient existing windows, but a small fix like a draft stopper or a tube of caulk on one window won’t move your total bill by anywhere near that much on its own.
Your actual results depend on your windows, climate, heating costs, and how well each product is installed. Before considering solar power for your home, prioritize these basic efficiency improvements. For a broader look at how your whole home uses energy, the Department of Energy’s Energy Saver program is a useful next stop.
Common Window Insulation Mistakes to Avoid
- Treating every cold window as an air leak. Sometimes the problem is heat transfer through the glass, which calls for film, curtains, or a storm panel rather than caulk or weatherstripping.
- Sealing a part that’s supposed to move. Caulking a sash shut, or over-sealing a track meant to slide, can damage the window and trap you from opening it when you need to.
- Sealing drainage weep holes. Storm windows and some sills include weep channels that allow moisture to drain out; blocking them can trap water and cause rot.
- Using incompatible products. Not every film or tape adheres well to every finish, and some adhesives can damage painted trim or historic wood sashes.
- Expecting curtains to fix an air leak. A thermal curtain improves comfort and cuts radiant heat loss, but it doesn’t seal a gap in the frame.
- Ignoring condensation. A poorly sealed interior storm panel can trap humid air against the original window and cause condensation between the two layers, which over time can lead to mold or wood damage. Persistent fogging or moisture deserves attention rather than being ignored.
- Blocking a window needed for emergency escape or required ventilation. Don’t permanently film or seal shut a window that serves as a fire exit from a bedroom.
- Spending on the most expensive fix before diagnosing the problem. A $5 roll of rope caulk sometimes solves what you were about to spend much more to fix.
The Bottom Line: Match the Fix to the Problem
The fastest path to a warmer home this winter starts with figuring out where the cold is actually coming from, not with buying the first product you see online. A drafty sash, a gapped frame, and cold glass each call for a different fix, and most of the options here cost less than a takeout dinner. Once you’ve sealed the obvious leaks, decide whether the remaining discomfort is worth a bigger step like an interior storm panel, or whether a thermal curtain and a little patience will get you through the season.
Frequently Asked Questions
Removable rope caulk and a homemade draft stopper are typically the least expensive options, often costing just a few dollars per window. They work best for small, specific gaps rather than whole-window heat loss, so pair them with a visual check first to make sure you’re solving the right problem.