You have vinegar, baking soda and an empty spray bottle. Before you start mixing, you should know which combinations are unsafe. DIY cleaning products can trim your spending and your packaging, but only when you skip the risky pairings.
Only 35% of 502 US adults knew bleach shouldn’t be mixed with vinegar, and 58% knew it about ammonia, according to a 2020 CDC survey report on an opt-in online panel. That panel wasn’t a national sample, so the figures illustrate the problem rather than measure it for the whole country. They still show how easy it is to guess wrong.
Below you’ll find 7 recipes, a surface table, a cost method and a plain answer on when to buy instead. If you’re curious about natural cleaning products you can make at home, safety and surface matching come first. This article is built from named public sources, checked as of November 2026.
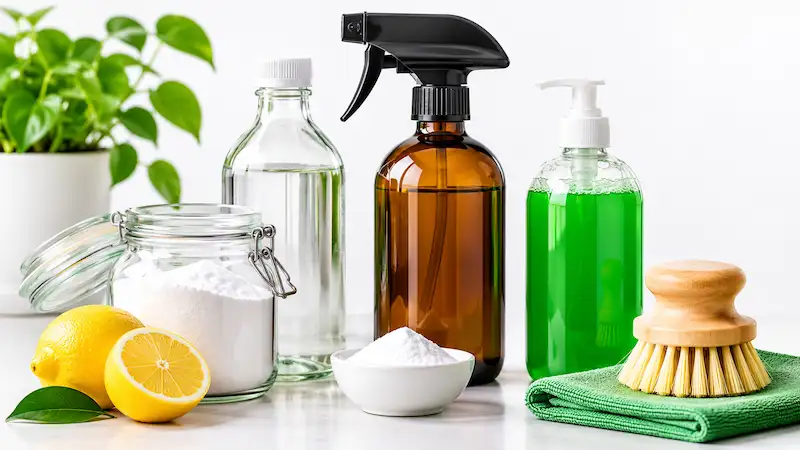
You can make DIY cleaning products from pantry staples like white vinegar, water, baking soda and plain dish soap. A simple start is equal parts white vinegar and water in a spray bottle for glass and other non-stone surfaces. Never use it on marble or stone, and never mix bleach with vinegar or ammonia.
What Never to Mix When You Make DIY Cleaning Products
You’re about to boost a bathroom cleaner with whatever is under the sink. Stop. Before you mix any homemade cleaning products, run through this never-mix checklist:
- Bleach with ammonia or any other cleaner. CDC’s bleach safety guidance, reviewed in August 2026, says to never mix bleach with ammonia or any other cleaner.
- Bleach with vinegar or ammonia. The 2020 MMWR report says this pairing can produce chlorine and chloramine gases that might damage lung tissue.
- Vinegar with castile soap. Lisa Bronner’s note on vinegar and castile soap describes a curdled, oily mess with no cleaning power. The page comes from the family behind Dr. Bronner’s castile soap, so it has a commercial interest.
- Anything in a shared bottle. Use one product per bottle, label it, and never reuse a store-bought bottle that held bleach.
If someone inhales fumes, open windows, leave the area and call poison control. Seek emergency care for trouble breathing. This is general safety information, not medical advice. For mold or drain problems that keep coming back, hire a licensed professional rather than experimenting.
You also don’t need a boosted cleaner. A single plain ingredient usually costs less than a blend, and it keeps the chemistry simple.
Match the Cleaner to the Surface
Will this ruin your countertop? The answer depends on the surface as much as the recipe, so check the table before you spray.
| Recipe | Safe on | Avoid on |
|---|---|---|
| 1. Vinegar-water all-purpose spray | Glass and other non-stone surfaces | Marble and natural stone |
| 2. Soap-and-water spray | Floors and stone (the stone-safe option) | Patch-test a hidden spot first. |
| 3. Glass spray | Glass | Marble and natural stone |
| 4. Baking soda scrub paste | Sinks, tubs and toilet bowls | Delicate finishes |
| 5. Drain deodorizer | Drains | Marble and natural stone |
| 6. Citrus-peel infused vinegar | The same non-stone surfaces as recipe 1 | Marble and natural stone |
| 7. Oven paste | Cooled oven interiors | Patch-test a hidden spot first. |
Skip vinegar on marble, natural stone and any finish you aren’t sure about, unless the stone’s maker or installer says it’s fine. Patch-test a hidden spot with every recipe. If you have stone counters, the soap-and-water spray is your stone-safe option.
Takeaway: When in doubt, reach for soap and water and test a hidden spot first.
Your Pantry Starter Kit
Open your cabinet. You probably have most of this.
- White vinegar
- Baking soda
- Castile or plain dish soap
- Washing soda (none of the seven recipes below use it, so there’s no need to buy it)
- Lemon
- Distilled water (optional)
Start free. Reuse a clean glass jar or spray bottle you already own, or turn an old T-shirt into rags with this old T-shirt rags idea. Label every bottle with the date and contents, store it away from sunlight, and keep it out of reach of kids.
Leave borax, ammonia and bleach out of these recipes. Using what you own keeps your first batch of homemade cleaning products close to free.
7 DIY Cleaning Recipes From Pantry Staples
These DIY cleaning products use ingredients you may already own, and each recipe below names the surfaces and situations where it shouldn’t ever be used. Pick the recipe for the mess in front of you.
1. Vinegar-water all-purpose spray
Equal parts white vinegar and water make a simple DIY all purpose cleaner.
Ingredients: White vinegar, water and a clean, labeled spray bottle.
How to use: Spray a hard, non-stone surface, then wipe with a clean cloth. Patch-test a hidden spot first, and keep this as your everyday wipe-down.
Avoid on: Marble and natural stone.
Trade-off: Bronner states vinegar is not a disinfectant, so this spray cleans but does not disinfect. Choose something else when you need that.
2. Soap-and-water spray (stone-safe)
Combine a small amount of plain dish soap with water for a simple DIY cleaning spray.
Ingredients: Plain dish soap, water and a labeled spray bottle. Use only a small amount of soap.
How to use: Spray, then wipe with a damp cloth. It also works for floors. Extra soap can be harder to wipe away, so go light.
Avoid on: Delicate finishes, until you’ve patch-tested a hidden spot.
Trade-off: It’s the stone-safe option, but it won’t disinfect. Never add vinegar, since Bronner describes soap and vinegar reacting and curdling.
3. Glass spray
Fill a spray bottle with equal parts white vinegar and water for windows, mirrors and shower doors, the same mix Bronner uses for glass.
Ingredients: White vinegar and water, half and half, in a labeled spray bottle.
How to use: Spray lightly on the glass and wipe with a clean cloth.
Avoid on: Marble and natural stone, such as a stone sill or surround.
Trade-off: It’s the same mix as recipe 1, so one clearly labeled bottle can do both jobs.
4. Baking soda scrub paste
Stir baking soda with just enough water to make a spreadable paste.
Ingredients: Baking soda and water.
How to use: Spread the paste on sinks and tubs, scrub gently with a damp sponge or cloth, then rinse well. For the toilet bowl, scrub with the paste and a brush.
Avoid on: Delicate or polished finishes. Patch-test a hidden spot first.
Trade-off: It’s a gentle abrasive, but hard scrubbing can still dull some finishes. It cleans grime and does not disinfect.
5. Drain deodorizer
Add baking soda to the drain first, then vinegar, one after the other.
Ingredients: Baking soda and white vinegar, kept in separate containers.
How to use: Pour a small scoop of baking soda down the drain, then follow with a small amount of vinegar. Never premix them in a capped bottle.
Avoid on: Marble and natural stone around the drain. Wipe up any splashes.
Trade-off: This freshens a drain but doesn’t clear a clog. Slow drains or standing water need a plumber, so hire a licensed professional.
6. Citrus-peel infused vinegar
Drop leftover citrus peels in a jar, cover them with white vinegar, steep until the vinegar smells of citrus, then strain.
Ingredients: Leftover citrus peels and white vinegar.
How to use: After straining, cut it with water as in recipe 1 and spray non-stone surfaces. Label the bottle with the date and contents.
Avoid on: Marble and natural stone, as with any vinegar.
Trade-off: It turns scraps into a cleaner, which cuts waste. It’s still vinegar, though, so it follows the same surface cautions and isn’t a disinfectant.
7. Oven paste
Mix baking soda with a little water to make a paste for baked-on spills.
Ingredients: Baking soda and water.
How to use: Cool the oven fully and ventilate the kitchen. Test a small spot, spread the paste, then wipe thoroughly with a damp cloth.
Avoid on: Any part your oven’s manual says not to scrub.
Trade-off: Heavy buildup may take more than one round, so plan some patience.
What DIY Cleaning Products Really Cost
That bottle of store cleaner adds up. Does your homemade version? Prices vary by state and store, so the most reliable number is the one from your own receipts. Use this method with the prices you pay, and treat the result as illustrative.
- For one 16 oz batch, write down each ingredient and the amount you use.
- Note each package’s price and the number of units in it, with the date and the store.
- Cost per 16 oz batch = the sum of (price per package divided by units per package, times amount used).
- Annual savings = (store cost per bottle minus DIY cost per bottle) times bottles per year.
Run the numbers as a range if prices shift between stores. Free ingredients, such as leftover citrus peels, count as zero, and a reused bottle saves the cost of a new one.
A store product is the better choice when you need to disinfect: pick one whose label says it disinfects and follow the label. If you’d rather buy refills than mix your own, the zero waste shopping swaps cover that route.
Pets, Kids and Essential Oils
Concentrated essential oils can endanger pets. The ASPCA’s essential oil guidance, published in 2022, says concentrated tea tree oil may cause problems at 7 to 8 drops. That figure concerns concentrated oil used on pets, not diluted cleaning sprays, so don’t stretch it further.
None of the seven recipes above needs essential oils. If you have pets, skip oils, keep any you own out of reach, and ask your vet before using them. Don’t treat any oil, lavender included, as pet-safe. Store every cleaner away from kids too.
Ask your vet.
If you’re searching for non-toxic cleaning products to make at home, remember that homemade doesn’t mean zero risk.
When DIY Isn’t Enough
Bronner states vinegar is not effective as a disinfectant. If you need to disinfect, buy a product whose label says it disinfects, and follow the label.
Buy instead when: you need to disinfect, or you’re dealing with mold. Don’t count on vinegar or any recipe here to handle mold. Mold beyond a small area needs more than DIY, and large or recurring mold needs a professional. For these jobs, a store product used as its label directs is the better choice.
Start With Three, Free First
Start with three recipes: the soap-and-water spray, the baking soda paste and the vinegar-water spray. Make them with what you already own, and use up your current cleaners before you switch. Add another recipe only when a specific mess calls for it.
You don’t need to buy anything to begin. Label each bottle, and give yourself a few weeks to see what works on your own surfaces. A small start also keeps the never-mix list easy to remember.
Your Next Step
Seven recipes and a short never-mix list are enough to cut a bottle or two from your routine. DIY cleaning products reward a careful start: one recipe, one labeled bottle, one surface you’ve patch-tested. Pick a recipe today, and reread the never-mix list before you mix it. You’ll find more room-by-room ideas in our Sustainable Home guide.
Frequently Asked Questions
They’re good for everyday grime on surfaces they suit, but not for disinfecting. Bronner states vinegar is not a disinfectant, so a recipe with vinegar won’t replace a product whose label says it disinfects. Match the recipe to the surface, patch-test first, and buy a labeled disinfectant when you need one.