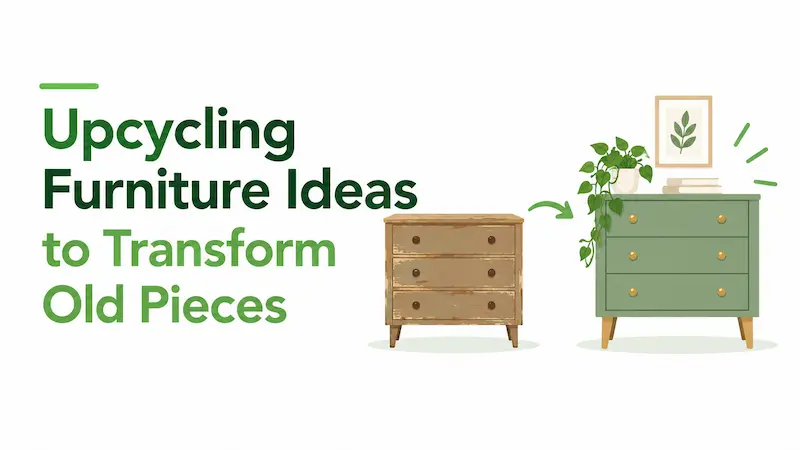
An old piece of furniture presents a real decision problem. Before you search for a replacement or haul the piece to the curb, it helps to understand what you are actually dealing with and what a realistic intervention might involve.
Upcycling furniture is a broader category than most people realize. It is not a synonym for painting something a new color. A meaningful transformation might involve refinishing the original surface, changing the hardware, modifying the structure, repurposing the piece for a different function, or recovering useful components from something that can no longer work as intended. Some projects are well within the reach of a careful first-timer; others require tools, skills, or a time commitment that should be assessed honestly before beginning. If you are new to furniture projects, start with these upcycling ideas for beginners and choose an approach that matches your experience.
The 15 ideas here are organized around a practical question: what does your specific furniture actually need, and does that match a project that makes sense for your situation?
Before You Start: What Does Your Furniture Actually Need?
The first useful question is not “what should I do with this?” It is “what does this piece actually need?”
Most old furniture falls into one of five practical categories, and the right project depends on which one applies.
Refresh. The piece is structurally sound and functionally useful, but it looks tired or dated. A refresh might involve cleaning, minor repairs, and new hardware. Many pieces in this condition receive far more intervention than they need.
Refinish. The existing surface is deteriorating, discolored, or incompatible with the current space. Refinishing addresses the surface without changing the structure or function. It suits solid wood, some veneered pieces, and metal furniture in sound structural condition.
Modify. The structure is sound but the current form is not quite right. A modification might add storage, change dimensions, or adjust the piece’s layout. This requires more planning and skill than surface work.
Repurpose. The piece can no longer usefully serve its original function, but its structure is solid enough to serve a different one. A dresser becoming a bathroom vanity, or a cabinet becoming an entryway bench, are common examples. Repurposing often involves structural modification alongside surface work.
Salvage. The piece itself is no longer viable as furniture, but individual components, such as solid wood panels, drawer hardware, or decorative elements, can be extracted and used elsewhere.
The word “makeover” appears throughout consumer media as a catch-all term. It is useful shorthand, but it does not tell you much about what a specific piece actually needs.
A note on terminology: some of the 15 ideas below are technically repurposing or salvage rather than upcycling in a strict sense. The boundary between these terms shifts depending on context, and that overlap is fine here. What matters is whether the approach suits the furniture, the goal, and the available resources.
15 Upcycling Furniture Ideas for Old Pieces
1. Refinish an Old Wooden Piece
Refinishing involves removing the existing surface treatment and applying a new one. The goal is a restored or updated surface on an otherwise sound piece. Done well, it can extend the useful life of furniture significantly and, in the case of well-made solid wood pieces, recover something worth keeping.
Before committing to this project, confirm that the piece is actually refinishable. Solid wood is generally a good candidate if the structure is intact. Veneered pieces can often be refinished, but veneer thickness varies, and aggressive sanding can cut through to the substrate beneath. Many flat-pack pieces are not solid wood at all. If the core is MDF or particleboard with a printed or laminate surface, traditional stripping and sanding may not be appropriate. Knowing what you have before starting is not optional.
The process typically involves removing existing hardware, cleaning the surface, stripping or sanding the old finish, addressing any surface damage, applying the chosen new finish in appropriate conditions, and allowing adequate curing time. Specific products have specific requirements. Drying and curing times vary by product, and following the manufacturer’s instructions matters more than any general rule of thumb.
Refinishing is not a quick project, but it does not require highly specialized skills for most pieces. The main investment is patience and preparation.
2. Give an Old Dresser a New Purpose
A dresser with functioning drawers and a sound carcass has more potential than its original purpose suggests. The most common repurposing converts a dresser into a bathroom vanity by cutting an opening in the top for a basin and adapting the plumbing connections. This is a real construction project, not a casual weekend task. It involves plumbing work and significant moisture management, which means it is not appropriate for every material. Solid wood dressers are more suitable than particleboard pieces, which do not handle sustained moisture exposure reliably.
A lower-effort repurposing keeps the dresser in its existing role but reassigns it to a new room or purpose: a media console, a kitchen island supplement with a butcher block top, a craft storage unit, or a children’s activity station. In these cases, surface treatment and hardware become more important than structural modification.
Suitability depends almost entirely on structural condition and material. A dresser with failing drawer runners or delaminating surfaces requires remediation before repurposing, and the realistic cost of that remediation should factor into the decision.
3. Refresh a Dated Nightstand
Nightstands often represent the best case for furniture work because they are small, structurally simple, and relatively easy to handle. Most interventions stay at the surface level: a new finish, new hardware, or both.
The challenge is scale, not complexity. Smaller pieces have less margin for error. An uneven paint application or misaligned hardware hole is harder to overlook on a compact piece where a viewer’s eye naturally focuses. Careful preparation matters more than on larger surfaces where minor inconsistencies become less noticeable.
Before committing to a surface refresh, confirm that any drawer operates properly. A beautiful nightstand with a sticky drawer remains a frustration. Runner problems can often be addressed by cleaning the runners and applying an appropriate dry lubricant, but some require more involved attention.
4. Turn an Old Table Into a Practical Workspace
A sturdy dining table, desk, or utility table can become a usable workspace with relatively little structural modification. The key variables are surface stability, height, and whether the piece can handle the intended use.
For a desk conversion, standard desk height is typically around 28 to 30 inches for seated use, though individual ergonomic needs vary. Structural stability and a surface treatment suitable for regular contact are the other essentials. If the original surface is damaged or unsuitable, this is a reasonable point to refinish it.
A table being adapted as a workshop bench or utility table has different requirements. The structure needs to handle load and vibration, and additions like a vise or tool storage introduce more significant modification. Surface area and weight capacity are practical limits to assess honestly before planning. A delicate piece repurposed as a daily workspace will wear accordingly.
5. Convert a Cabinet Into Useful Storage
Cabinets with sound carcasses but outdated or impractical configurations are good candidates for modification. The possible changes range from minimal (new hardware, a refinished interior) to significant (removing doors, adding shelves, adjusting configuration).
Removing the doors from an enclosed cabinet creates an open shelving unit. Whether this improves the piece depends on the carcass’s interior construction. Many cabinets have unfinished interiors that look perfectly acceptable behind a closed door and considerably less so without one. Finishing the interior is often necessary before this reads as intentional.
Adding shelves requires matching the new shelf-pin hole spacing to the existing configuration, or drilling new holes at the correct spacing and confirming that the shelf material and supports can handle the intended load.
If the cabinet will serve a new room, consider whether the existing finish is compatible with the new context. A kitchen cabinet relocated to a bedroom or home office may need a different surface treatment to suit the space.
6. Give a Bookshelf a New Role
Bookshelves are structurally simple and versatile. Standard upright-and-shelf configurations can be adapted as display units, pantry storage, a laundry room organizer, or a more built-in-style feature when properly anchored to the wall and finished with appropriate trim.
The structural concern specific to bookshelves is shelf sag. A shelf that has carried books for years may show visible bowing. Adding a center support or replacing the shelf with thicker or more dimensionally stable material addresses the problem, though the edge and face finishing of the original shelf will then need to accommodate the change.
Freestanding bookshelves, particularly taller ones, should be anchored to a wall stud regardless of their new purpose. This is a safety measure, not a style decision.
7. Reupholster a Suitable Chair
Reupholstery is among the more skill-dependent projects on this list, but it is also one of the most transformative and, under the right conditions, among the most practically sensible.
The determining factor is the frame. A chair with a structurally sound hardwood frame that is simply showing worn or dated fabric is an excellent candidate. A chair with a compromised frame, failing springs, or degraded webbing requires more significant internal repair before new fabric is worthwhile. Putting good material on a failing structure wastes both the fabric and the effort.
For those attempting reupholstery for the first time, simpler chair types are meaningfully easier than complex ones. A drop-in seat cushion, where the padded seat panel simply lifts out, involves stapling new fabric to an existing frame and can be done with basic tools and care. A fully upholstered chair with tufting, welting, and curved elements requires considerably more skill and appropriate tools.
Fabric choice affects both appearance and durability. Upholstery-grade fabric is rated for abrasion resistance, which matters for chairs that will see regular use. General decorator fabric used in an upholstery application may wear differently.
8. Change the Character With New Hardware
Hardware replacement is among the lowest-effort, lowest-cost interventions that produce a meaningful visual change. New handles, knobs, or pulls can materially alter how a piece reads in a room without touching the surface finish.
The practical constraint is hole spacing. Replacing a single-hole knob with another single-hole knob is uncomplicated. Replacing a knob with a bar pull, or vice versa, requires either matching the new hardware’s drilling pattern to the existing holes or filling the existing holes and drilling new ones. Filling and redrilling is possible, but misaligned hardware is a difficult fix once it is in place.
Measure existing hole spacing before purchasing. Most bar pulls use center-to-center measurements, and common standardized spacings exist, but not all hardware fits all configurations. Confirm the fit before drilling.
9. Add a Decorative Surface to Selected Areas
Rather than refinishing an entire piece, it is sometimes more practical or more effective to resurface a specific element: a tabletop, drawer fronts, or a cabinet panel. Options include contact paper for low-commitment changes, tile or mosaic for surfaces where durability and moisture resistance matter, or a contrasting paint or finish treatment applied to selected elements only.
Contact paper, sometimes sold as adhesive film, applies without specialized tools and can be removed without damage to most surfaces if handled carefully. Quality varies considerably between products, and the higher end of the range performs noticeably better in terms of edge adhesion and longevity.
For a more permanent surface change, tile adhered to a tabletop creates a durable, heat-resistant, and moisture-resistant surface on an otherwise impractical piece. The structural integrity of the underlying surface needs to handle the tile’s weight and the adhesive’s specific requirements.
10. Turn Old Drawers Into Useful Storage
When a dresser, desk, or cabinet is no longer useful as a complete piece, individual drawers can serve as standalone storage. Stacked or wall-mounted with some finishing attention, they function as open shelving, bedside organizers, toy storage, or workshop parts bins.
The simplest approach stacks drawers on a surface and uses them as open-front bins. Mounting them to a wall requires appropriate anchoring hardware and confirms the wall type can support the load.
Visual appeal depends primarily on the condition and finish of each drawer’s exterior. A raw wood drawer benefits from finishing before it looks intentional rather than improvised. Drawers with painted or laminate exteriors in good condition often need less intervention. This approach is particularly useful when the rest of the furniture piece is unsuitable for a larger project.
11. Turn a Suitable Furniture Piece Into an Entryway Organizer
A console table, bench, lower bookcase, or compact cabinet can serve an entryway function with targeted additions: hooks for coats and bags, a surface or basket storage for shoes, or an integrated seating element. The transformation is primarily additive rather than structural.
The most important consideration is fit. Entryway furniture needs to work with the available dimensions and the household’s actual storage requirements. A piece that blocks traffic flow or creates visual clutter at the entry creates a different problem than the one you started with.
If hooks are being added, the wall anchoring matters as much as the furniture modification. Hooks carrying bags and coats exert meaningful downward and outward force, and appropriate fasteners for the specific wall type are necessary.
12. Transform a Small Table Into a Plant Stand
End tables, side tables, and occasional tables can serve as plant stands when the surface can handle occasional moisture and the height suits the plant and the room. The practical modification is primarily surface treatment. A surface that will contact plant pots and occasional water spillage benefits from a finish that resists moisture. Many standard furniture finishes are adequate for this use, but bare or poorly sealed wood surfaces can stain or swell with repeated moisture contact.
If the plant is heavy, assess whether the table structure can handle the weight. Decorative side tables are sometimes lightly built, and a large potted plant can exceed what the piece was designed to carry.
13. Use a Selective or Two-Tone Finish
Finishing an entire piece uniformly in the same color or treatment is one approach. Applying different treatments to different elements can produce a result that reads as more considered and often suits the original piece more naturally than a uniform treatment would.
The most common version involves painting the body of a dresser or cabinet one color while leaving the top in a natural wood finish, or applying a darker tone to the base and a lighter one to the upper shelves of a bookcase. Another option is a contrasting interior: the visible inside of a cabinet or shelving unit finished in a different color than the exterior.
The specific requirements depend on which approach is chosen. An unpainted wood top requires a suitable protective finish. Where different finish types meet at an edge, compatibility between products is a practical consideration. Manufacturer guidance for the specific products involved applies here.
14. Change the Furniture’s Function Without Completely Rebuilding It
This category covers functional modifications that do not require significant structural changes but produce a meaningfully different piece in use. Examples include adding folding legs to a side table to create a tray table, replacing fixed legs with casters to create a mobile unit, raising a piece by extending its legs, or adding a simple interior fitting such as a wine rack insert to an existing cabinet.
The challenge is that some changes are uncomplicated and others are not, and the visual similarity between easy and complex versions of the same modification can mislead. Replacing legs on a piece with exposed screw mounts is one task. Replacing legs on a piece with recessed or glued joints is a different one. Assess the specific construction before planning.
Leg modification deserves particular attention. Adding casters requires appropriate hardware for the base material and load. Trimming legs to lower a piece’s height affects structural integrity if done incorrectly, and even correct execution changes the piece’s proportions in ways that may or may not read well in the finished result.
15. Salvage Useful Components From an Unusable Piece
Not every piece is recoverable as furniture. A piece that cannot be saved as a whole may still contain components worth keeping: solid wood panels, quality drawer hardware, glass inserts, decorative carved elements, or usable foam.
Solid wood components from otherwise unusable pieces are among the most practical salvages. A sound solid hardwood tabletop attached to a failed base can be repurposed as shelving material, a headboard, or a workbench surface. Reclaimed solid wood has practical value independent of the original furniture’s worth.
Before dismantling anything, identify which elements are usable and what you will actually do with them. Salvage requires storage space, and accumulating components without a specific use for them simply transfers the problem rather than solving it.
Furniture Materials Matter: Choose the Approach Carefully
Material category matters because different materials respond differently to the same treatment. But material category alone does not tell you everything. Two pieces both described as “wood furniture” can have entirely different underlying compositions, surface treatments, and structural approaches.
Solid wood is generally the most forgiving for surface work. It can be sanded, stripped, stained, painted, oiled, or waxed depending on the piece and the intended use. Repair is often practical because the material is consistent throughout, and the surface condition and grain guide how much preparation is needed before finishing.
Veneer is a thin layer of real wood adhered to a substrate, typically MDF, particleboard, or plywood. Its appearance resembles solid wood, but the surface layer is limited in thickness, which constrains how aggressively it can be sanded. Veneer bubbling, lifting, or cracking can often be repaired with appropriate adhesive and clamping, but the result depends on the extent of the damage and whether the grain pattern can be reasonably matched.
MDF (medium-density fiberboard) machines cleanly and accepts paint well with appropriate preparation, but its behavior at edges and with moisture differs from solid wood. Edges absorb more finish than faces, which creates uneven results without a suitable sealer. MDF does not hold screws as reliably as solid wood, particularly at edges or in areas that have been previously drilled.
Particleboard shares many characteristics with MDF but is less consistent in density and typically less dimensionally stable with moisture exposure. Many flat-pack and budget furniture pieces use particleboard as the core material. Swelling at edges from repeated moisture contact is a common failure mode that cannot easily be reversed.
Laminate surfaces are applied finishes, usually a resin-impregnated paper or plastic film bonded to the substrate. They are not base material that can be sanded away. Standard paint adhesion to laminate without preparation is unreliable. Where painting a laminate surface is the goal, appropriate surface preparation including deglossing and priming with a bonding primer is necessary. The manufacturer’s instructions for the specific primer and paint govern what steps apply.
Metal furniture varies considerably by construction and finish. Rust is the primary structural concern. Light surface rust can often be addressed with appropriate treatment and primer before refinishing; deep pitting or structural rust is a different and more serious matter. The appropriate primer for metal differs from wood primers, and this is not a step to approximate.
One principle that applies regardless of material: existing finish condition affects what is possible. A previously painted surface in poor condition, a surface contaminated with wax or silicone products, or a surface with multiple layers of unknown finish can all affect how a new treatment adheres. When a technical application depends on a specific product, follow the manufacturer’s guidance for that product rather than general advice that may not apply to the specific situation.
Upcycling Furniture Without Painting It
Paint has become the default furniture transformation in most consumer coverage of this topic, but many appropriate and effective interventions involve no paint at all. If you are looking beyond traditional furniture makeovers, there are plenty of upcycling ideas that focus on changing an item’s function, materials, or components instead.
Refinishing with a clear or tinted product. For solid wood with attractive grain, a clear oil, wax, or varnish applied after appropriate surface preparation preserves and enhances the original character. Stripping a heavy dark stain and applying a lighter oil finish can reveal wood that was largely hidden. The surface does not need a new color to benefit from refinishing.
Hardware replacement alone. New hardware on a piece with an otherwise acceptable surface can meaningfully update its appearance without touching the finish. This works particularly well when the existing finish is in good condition and the hardware has become visually outdated or physically worn.
Reupholstery or cushion replacement. A chair or bench with a sound frame can be substantially changed by recovering the seat, back, or both. The color, texture, and pattern of new fabric change how the piece reads in a room entirely independent of the frame’s finish.
Functional modification. Adding or modifying elements to change how a piece is used, as covered in ideas 11 and 14, can make a piece considerably more useful without altering its surface.
Cleaning and preservation. Some neglected pieces have accumulated layers of wax buildup or surface contamination that disguise the original finish’s actual condition. Appropriate cleaning with products suited to the surface type can reveal something that was not as deteriorated as it first appeared. This is particularly worth investigating on older pieces with original finishes that may have significant quality beneath the neglect.
Preserving an original feature that works is not the same as settling for less. A piece with an attractive original surface may be better served by appropriate cleaning and maintenance than by stripping and starting over.
Does Upcycling Furniture Actually Save Money?
The short answer is: sometimes, and it depends on the specific situation.
The argument for financial benefit is strongest when the furniture is already in your possession, structurally sound, and the required intervention is limited in scope. Hardware replacement, minor repairs, and a careful surface refresh can cost relatively little if basic tools are already available. In that scenario, improving the piece can cost considerably less than purchasing a comparable replacement.
The argument weakens in several circumstances.
When the piece requires significant structural repair before the desired transformation is possible, the cost of skilled labor or specialist materials can approach or exceed the cost of a suitable replacement.
When the project requires tools or equipment you do not already own, renting or purchasing them adds to the actual project cost. This does not make the project wrong, but it belongs in the honest calculation.
When the underlying piece is not particularly well-made, spending substantially on a particleboard chest of drawers from a discount retailer raises a reasonable question about useful life relative to the investment.
When the project needs professional work, reupholstery by a professional upholsterer, spray finishing by a professional finisher, or structural repair by a skilled carpenter all represent costs that should be included in any realistic comparison with alternatives.
A more useful framework for the financial question: what is the realistic total cost of materials, hardware, repairs, equipment, and any professional services needed to complete the project to a satisfying standard? How does that compare to the cost of a suitable replacement, noting that a solid second-hand piece may be available at a lower price than a new equivalent? And how does the expected useful life of the finished piece factor into the comparison?
Time and effort are also real costs, even if they do not appear in a materials receipt. A project that takes multiple weekends is a meaningful commitment regardless of the dollar outlay.
How to Upcycle Furniture: A Practical 6-Step Process
The sequence matters. Starting a surface transformation before addressing structural problems, or applying a finish to an improperly prepared surface, typically creates results that need to be redone.
1. Inspect the furniture and document its condition. Work through the piece systematically. Check joints, test structural connections, look for moisture damage, assess the surface finish, and confirm the material where possible. Note what needs to be addressed before the transformation begins and what can reasonably be left alone. Photographs taken before starting are useful reference during the project.
2. Clean and prepare appropriately. Surface contamination interferes with adhesion and finish quality. The appropriate cleaning method depends on the surface material and existing finish. For most furniture surfaces, removing grease, dust, and wax residue is a reasonable starting point. Allow the surface to dry thoroughly before proceeding. Do not sand a surface that still contains wax or silicone contamination; these can spread rather than lift with sanding.
3. Repair structural or functional problems. Address loose joints, damaged hardware, failing drawer runners, or broken elements before proceeding to surface work. A structurally repaired piece with a less polished finish is more useful than a beautifully finished piece that wobbles. Joint repair typically involves cleaning old adhesive from the joint surfaces and regluing with an appropriate adhesive under adequate clamping pressure.
4. Apply the chosen transformation. This step encompasses the surface work, structural modifications, or functional additions that constitute the project. Follow the manufacturer’s instructions for any products involved, including primers, finish products, adhesives, and specialty treatments.
5. Allow products to dry or cure appropriately. Dry time and cure time are different things. A paint surface can feel dry to the touch well before it has cured to a durable finish. Most products achieve full cure over days rather than hours. Using or stressing a surface before adequate curing affects the final durability of the finish. Product instructions specify the relevant times for the specific product in use; these vary and should not be approximated from general sources.
6. Reassemble, inspect, and test the finished piece. Reinstall hardware, confirm that moving parts operate correctly, and assess the finished piece in the space where it will be used. Light and room context affect how a finish reads. Address any issues while the project materials are still available.
How to Make an Upcycled Furniture Piece Look Finished
The difference between a furniture project that reads as intentional and one that looks like a work in progress is usually traceable to surface preparation, edge treatment, and hardware compatibility.
Surface preparation determines finish quality. A paint job applied over inadequate preparation will show through the finish. Filling, sanding, and priming appropriately before applying the finish is not optional if the goal is a clean result. On porous or uneven surfaces, a primer may require more than one coat.
Edges and recesses are where preparation failures show most clearly. On furniture with molding, carved details, or frame-and-panel construction, these elements require specific attention during both preparation and finishing. Finish that pools in corners or leaves bare patches on raised elements creates an uneven appearance that is hard to overlook in the finished piece.
Hardware should suit the piece’s overall character. Hardware that is inconsistent in finish, scale, or style with the rest of the piece can undermine the result. Matching the hardware’s visual weight to the piece’s scale, and the hardware’s metal finish to any other exposed metal elements, produces a more resolved outcome.
Visible defects should be addressed before finishing. Deep scratches, chips, or surface damage that can be filled or repaired will be more apparent after finishing if left unaddressed. Filler products vary in their behavior under paint and clear finishes, and both product selection and application technique affect the result.
Restraint often serves the piece better than additions. Adding decorative elements or embellishments is a reasonable choice in the right context, but it is also one of the more difficult aspects of furniture work to execute without the result appearing busy or forced. Where attractive original features exist, preserving them is generally a better decision than covering them.
Common Furniture Upcycling Mistakes
Starting with the project rather than the furniture. Deciding on a transformation before assessing whether the specific piece is a reasonable candidate is the most consistent starting-point error. A paint color selected from an inspiration image is not a plan; it is a starting point that may or may not suit the actual furniture, the material, or the intended use.
Ignoring structural problems. Surface transformation on a structurally failing piece produces a better-looking piece that still fails structurally. This wastes both effort and materials. Structural assessment belongs at the beginning, before any other work.
Treating all furniture as interchangeable. Material, construction, and existing finish significantly affect what approach is appropriate. Advice that is accurate for solid wood may be entirely wrong for laminate-covered particleboard. Assuming they are the same leads to predictable adhesion failures and poor results.
Skipping surface preparation. No amount of quality paint compensates for inadequate preparation. This is the most frequent source of peeling, bubbling, and uneven finishes in furniture projects.
Purchasing materials before finalizing the plan. Paint color, hardware dimensions, fabric yardage, and adhesive type all depend on details that should be confirmed before buying. Returns on partially used materials or incorrectly sized hardware are often complicated.
Ignoring dimensions. A piece being repurposed for a new location needs to fit that location. A table being adapted as a desk needs to be at a functional height. These are measurements to take before work begins, not discover afterward.
Rushing curing and drying. A finish that is stressed before adequate curing will show it. Follow the product instructions for the specific product in use rather than general guidelines from other sources.
Overspending on a poor candidate. A piece with significant structural deterioration, extensive material damage, or specialized restoration requirements can absorb a great deal of time and money without producing a satisfying result. Recognizing this before beginning is both financially and practically useful.
Copying a project without adapting it. A transformation that worked on a solid hardwood dresser may not be appropriate for a veneer-covered particleboard equivalent. Project inspiration is useful; direct imitation without adjustment is not.
When an Old Furniture Piece May Not Be Worth Upcycling
Not every old piece of furniture should become a project. Deciding not to upcycle is a valid conclusion, and sometimes the most sensible one.
Serious structural deterioration. Joints that have failed completely, carcasses that have twisted or racked, or frames with significant rot or insect damage represent more work than most surface-oriented upcycling projects can absorb. The cost of restoring the structure may exceed what the piece is worth by any reasonable measure.
Material damage that limits the options. Deep moisture damage in MDF or particleboard typically causes swelling and delamination that cannot easily be reversed. Extensive surface veneer damage on a piece with limited underlying value may not be worth addressing.
Specialized restoration requirements. Antique pieces, or pieces with significant historical or monetary value, are sometimes better addressed by a professional conservator than by a DIY approach. Conservation and restoration are distinct disciplines from general furniture refinishing, with different standards and methods.
Disproportionate project costs. If the realistic total cost of materials, repairs, and professional services approaches or exceeds the cost of a suitable replacement, the financial logic does not favor the project. There may be other reasons to keep a specific piece, but it should be an informed choice.
Safety concerns. Furniture with significant structural instability presents genuine safety concerns if it will be loaded, climbed on, or used in ways that stress the structure. This applies most directly to chairs, stools, beds, loft furniture, and children’s furniture.
More appropriate alternatives. Furniture in poor condition but still functional may be better donated to an organization that accepts used pieces than disassembled for a marginal project. Local furniture banks, charity resale shops, and community exchange programs accept pieces that no longer suit their original owners. Component salvage before donation is also worth considering.
The goal is a sensible choice for the specific piece, not a transformation by default.
Conclusion
The most useful principle here is that the right approach depends on the specific piece, not on a general preference for one technique over another. Sound construction, appropriate material, and a realistic assessment of project scope will take you further than any particular paint color or source of inspiration.
Some pieces are worth significant effort; others are better refreshed lightly and left largely alone; and some should be passed on, parted out, or disposed of responsibly. The underlying decision is not complicated, even when individual assessments require care: assess the structure, understand the material, define the realistic intervention, and match it to a project that makes sense for what you actually have.
Frequently Asked Questions
Not exactly, though the terms are sometimes used interchangeably. Refinishing refers specifically to improving or replacing a surface finish, typically on wood, by stripping and reapplying a protective or decorative coating. Upcycling is a broader term that encompasses refinishing but also includes repurposing, structural modification, functional adaptation, and component reuse. A refinished piece has a new surface; an upcycled piece may have a new function, structure, or application entirely.